With live attendance rates hovering around the 35-40% mark, recording your webinars is always recommended. Here’s what we will cover:
- Log-in or download into the provider’s platform
- Open a new meeting or online session
- Start recording with or without video feed
- Stop recording when finished
- Download your .mp4 audio or video file
- Promote your webinar
Interested in recording a webinar? Great! Webinars are an excellent way to create high quality content that will attract highly targeted audiences and increase engagement toward your company or brand. A Webinar must be seen as a long-term investment since you can post your webinar on different video platforms such as YouTube, Vimeo or on social media channels.
Want to get your webinar program off the ground?
The different types of webinar recording options
When we speak about webinar recordings, we usually differentiate between pre-recorded or live webinars and DIY or Managed Webinars.
Pre-recorded Webinars
Historically, webinars are seen as live events like conferences or town-hall style meetings. More recently, pre-recorded webinars are on the rise as they give much more control over the quality of the content you want to promote. Although pre-recorded webinars are less interactive, they are a great way to open up your pool of speakers as time zones no longer create any issues.

Live Webinars
Live webinars are the perfect tool if you want to create interaction with your audience – you can open up question and answer sessions and launch tools such as polling to ask for, receive and share feedback. The drawback of a live webinar is that you and your presenters need to be very well prepared since it is like live television: once you are live, you are live, there’s no editing! You will therefore have less control on the quality of your webinar, and you will not be able to predict the way the conversation will go.

DIY Webinars
Do-it-Yourself webinars are perfect for webinar professionals that have a heap of experience or company’s with very restricted budgets. The number of tools and platforms for DIY webinars on the market is massive. The well known platforms in this space are Zoom or GotoWebinar, with lesser known platforms such as EasyWebinar.

DIY webinars are a great way to produce content if you have experience in producing online events, and if your community is engaged and trained to use those tools. DIY webinars are also great if you need fast, cheap and low-key production. DIY webinars usually take more time to get to market as you need to find someone internally to help you create the content, create all marketing assets, promote and produce.
One of the drawbacks of hosting webinars on your own is that you will be vulnerable in terms of quality. It’s important to test beforehand to ensure your connectivity is up to standard and that you have the right equipment to make your webinar happen.
When running your in-house webinar, you will also rely on your own hardware and software. This means that the quality of your content will be determined by the quality of your microphone, webcam, and computer. Usually if you are using a free platform like Zoom ,you won’t be able to brand your landing page as well as your recording screen which can influence your brand image.
Finally, if taking this on all by yourself, you may struggle to make everything happen within a certain timeframe. Definitely get someone internally to assist you with your workflows, content creation and testing.
Managed Webinars
Managed webinars which are hosted by industry professionals will have a huge impact on the quality of your content. The managed approach is a great way for your company to offer branded webinars that can make a good impression on your target audience. Usually, we advise businesses that are new in webinar production to lean towards managed webinars because this is the perfect way to start and learn the process.
Managed webinars can be hosted at provider locations and studios which means the quality of their hardware is usually of the highest standard, and their webinar platforms are tried and tested. You are also hand-held throughout the entire process meaning you will receive proper training and coaching on how to manage your event from concept to completion.
If you decide to choose a managed approach, the technical side is taken care of by the provider of the webinar platform. Some platforms also offer live support during the webinar which means that potential attendee questions are taken care of which saves you time and enhances the user experience.
Finally, some providers like Redback Connect, can provide you access to their specialised studios which will turn your webinar production into a high-quality production.
How to record your webinar with Redback Connect?
Redback Connect is the leader in high quality webinar services and provides you with a clear process to follow for your webinar production. If you are running a DIY webinar with Redback Connect – here’s how to record your webinar:
- Log into your DIY webinar platform with your access details and PIN
- Click on the recording icon to start and stop recording
- Log into your Account Management Portal (AMP) to retrieve your recording
How to create a Managed Webinar with Redback Connect?
The first step in the process is to login to their dedicated Account Management Portal in order to complete a simple event booking form (click on the AMP link to get started).
This form helps the customer success team to make sure they have the right information to schedule an intro call, which is the second step in the process. During the intro call, the team helps you get your project take off and gets all the information to create all necessary assets.
In the third step, the experienced project management team creates all webinar assets necessary: email invitations, registration pages, autoresponder emails. Everything can be customised with your brand in mind so you can concentrate on other marketing activities while Redback Connect manages your webinar registration process. Like all project management processes, Redback Connect verifies all assets with you and these go live only after final approval. This is the fourth step of the process.
The team then provides you with advice to effectively promote your digital event across various channels – the goal is to help you maximise registrations.
In the sixth step of the managed process, the dedicated Presenter Experience Managers train your presenters online. These training sessions cover tips on using the platform, and ways to increase engagement and deliver high quality webinars. If you choose to present your webinar from Redback Studios, your presenters will be coached on how to present from there.
A few days before your webinar, we enter the seventh step of the process in which the last chance register/reminder emails are automatically sent to the attendees in order to gain maximum traction.
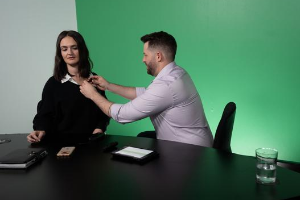
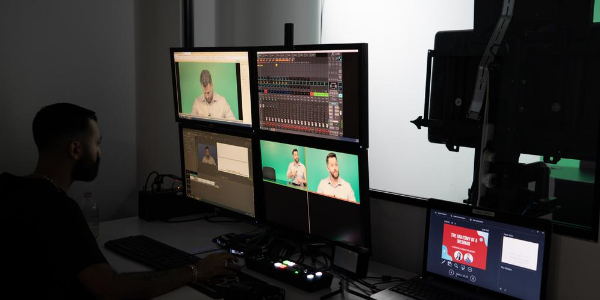
The eight step is the day of the webinar recording which can be conducted either remotely, from the studios or from any venue you like. The recording in the studio is managed by delivery technicians with state-of-the-art cameras, microphones, and other equipment. They will make sure that your videos are of the highest quality and edited if necessary.
Finally, you can retrieve all data relating to your webinar recording in your Account Management Portal with reports and feedback. The last step is making sure your content is available for attendees even after the event. That is why Redback Connect is also an on-demand video platform on which you can make your video available.
What tools do I need to record a webinar?
If you decide to record your webinar on your own, you need to be prepared to buy special equipment. Be it from your mac, your iPhone, or your windows desktop you will need: good camera (from your mobile phone or a webcam), good audio recording (microphone, headphones) and good screen recording.
Free screen recording tools like Movavi, FlashBack Express or Screencastify exist and come in all sorts of settings for you to play around with. These tools are available for mac as well as Windows 10, 8, 8.1, and 7. For your mobile screen recording, you will find other tools such as built-in Android tools that you can find in the settings or dedicated app such as AZ Screen Recorder, Mobizen Screen Recorder and others. All those providers offer you to save your recording on your windows or mac computer or mobile.
The issue with these tools is generally that because they are software-based, you need to download them onto your computer. This can cause all sorts of security issues and often your company’s firewall will not allow such downloads. Once again, specialised businesses like Redback Connect can help you get the best out of your webinar program without having security issues.
If you want to know more about webinars, we can also give you tips on how to promote a webinar or on how to plan a webinar or on how to create a webinar registration page.
Create great webinars thanks to our team of experts. If you need any help, please call us on 1800 733 416. Webinars.com.au is an Australian hosted company that manages over 200 managed webinarS per month for all types of companies.

